Friday, September 21, 2012

Dye your own peacoat!


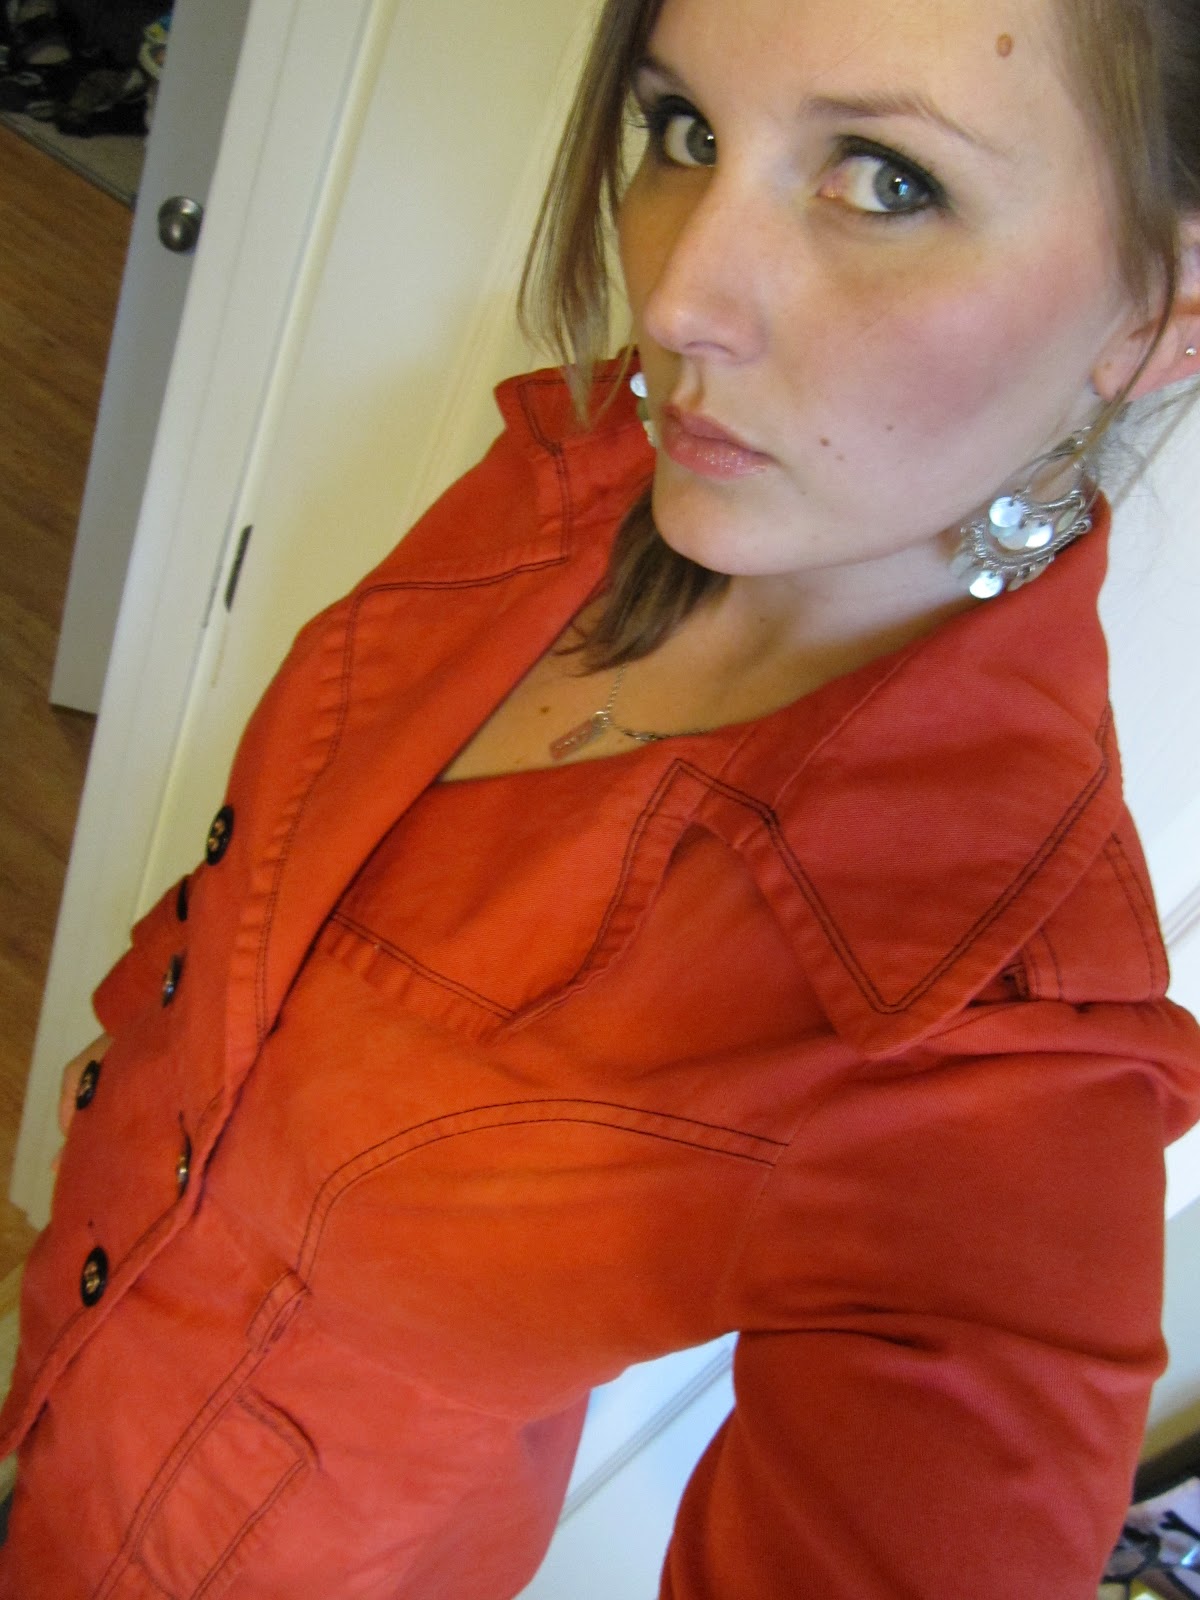
This was my little sisters peacoat that she was selling at our garage sale. It fit well but at the time I already had a black peacoat. I decided to try something new and bleach the CRAP out of it and then dye it.
I used a big bucket, placed 1 cup of bleach and then added hot water. I stirred it around then added my black peacoat. I then added more hot water till the water covered the peacoat by an inch. I let it sit for 2 hours. I would stir it around every 30 minutes or so just to make sure all the folds got bleached.
After two hours i disposed of the bleach water and rinsed the coat with hot water, then did it all over again TWO more times. I even let the coat sit in there over night. I know bleach eats away cloth but the coat held up great. Since it was black I had a long way to go to get it a light enough color to dye.
After bleaching it. I put it in the wash with hydrogen peroxide which counter acts the bleach. I dried it and this is what it looked like.
Not quite off white but it was a pale pale pink. I bought three boxes of Rit dye called Scarlet Red. I really wanted a Blood Red peacoat so I gave it a shot. I first only used one box of dye and followed the directions. It came out as a soft peach color. I then decided to try it again with two more boxes of dye. The directions specify to let it soak in the the dye bath for 30 minutes which I did about an hour, and I also added 1 cup of salt to the dye bath to help better dye the coat. The final product was a beautiful dark peach color (the computer makes it look orange, its not orange even though that would have looked good too. Not blood red as I originally wanted but I still love the color.
I cannot wait to wear this for FALL! I love my peacoats, scarfs, sweaters and jeans. :)

Tuesday, September 18, 2012

Easy Beach Wave Hair


I finally discovered a way to get a loose beach wave in my hair with no hassle. It took me maybe 15 minutes to do this but I also have somewhat thin hair. All you need is a curling iron, hair spray and possibly bobby pins. 
I pinned my bangs back in a poof first but you can do whatever pleases you. I then take a piece of hair and wrap it around the curling iron. The TRICK to this, is 1. DO NOT open the curling iron. Just wrap the piece of hair around the iron. TRICK 2. Let your hair twist as you wrap it around the iron. Dont worry about it being flat/straight as you would when doing ringlets. Here is a picture:
See how in my finger tip the hair strand is twisted...thats what we want! Also see how the iron is not opened, I wrapped my hair around it as a closed iron. Here is a picture of my hair when I was finished curling it without doing anything else yet. 
It is somewhat ringlet like but look closely...the ends are fairly straight while the rest of the strand is curly. The next step is the run your fingers through your hair and separate the curls. When finished, hairspray your hair while "poofin" it up with your hands. Once again here is the final product. 


Thursday, September 13, 2012

ReDone Bookshelf

I have been wanting to paint this old bookshelf for a while now to match our new Ikea shelf. I fell in love with the idea from pinterest to put a design on the inside backing of the shelf. Here is the old one. 
This was so easy to paint and decorate. I HATE HATE sanding so I used a primer, and brushed it on which took maybe 30 minutes. I let that dry, then I bought three cans of a dark brown (almost black color) spray paint. I started spraying! 
The most difficult part was  that my shelf wants to fall apart but I just WOULDNT let it! Not after I put all this time and money into it. I took off the backing carefully and bought some fabric that I liked, along with spray glue (kinda spendy 9.99 for a can). I cut out the fabric to match the backing, I sprayed it and layed down my fabric. It was just too easy. I then reassembled the backing and had fun placing it once again in our living room. I love it. It now matches and it has character. Here is the final outcome!
The shelf is from target so I had to do a little research on priming a smooth surface I think it is made of linoleum. Worked out great though. Here is a website I used for tips on spray painting anything. 

Total Cost to do this project:
3 Cans Spray paint 12.00
Primer 6.00
Brush 3.00
2 1/2y Fabric 13.00
Spray adhesive 10.00
Total: 44$ with products to spare for more pinterest crafts!

Thursday, September 6, 2012

Superhero Baby Room

When my husband and I found out we were having a boy, my husband turned to me and asked if we could do a superhero themed nursery. As I thought about it, I got excited with all the creative ideas I had. Here is our Little Aidens room. 
 I painted these myself. I got the inspiration from an artists website. He was not licensed to sell them so I painted them myself.
I also created my sons name with comic book letters. I bought these from Joann Fabrics for 3.99 each, and then my friend gave me this old vintage comic book that I cut apart in order to mod podge the paper on the cardboard letters. 


 Again, super easy! Just cut out colorful paper in the letter of your little ones name, and get it laminated. Laminating is super cheap and I just went to Kinkos.
The fun part is putting the whole room together with all the fun superhero things that friends and family got little Aiden. We received many blankets! We love them all!

Midnight Feedings Basket for New Momma

Since having my little one, I have grown a heart for new mommas. I remember getting so hungry in the middle of night when feeding my little one so here is a gift idea for those new mommas. It is a basket full of goodies. 

Snacks include:
Apples
peaches
trail mix (I bought this in bulk then divided it up in seran wrap)
apple sauce
granola bars
cookies

All I did was buy a white plastic bowl, even though a wicker basket would have been much cuter! I placed tissue paper in the bottom of it, then added a little gift tag welcoming baby and then a card to new momma explaining that these treats are for her nightstand or the nursery room when you feed your little one in the wee hours of the night. Its so simple and new moms appreciate it so much!

Tuesday, July 24, 2012

Kawaii Cloth Diapers and How you can save money!

After four months of using disposables, I asked myself why am I not cloth diapering? My husband and I are always looking for ways to save money monthly and here is an obvious way to be doing that. I researched on the internet that the average cost on diapers per year is anywhere from 560$-800$. IF you potty train at two years old that still $1120 MINIMUM. I found a bundle of 24 pocket cloth diapers, they are the Kawaii Baby brand, for 129.99$. Free shipping and they came with 48 liners. That comes out to be $5.42 per diaper! This was a steal because most cloth diapers range between 12-18$ each. Thanks to EBAY!
A little about the Kawaii diapers. They are snaps which are better than velcro because velcro will eventually wear and tear from all the washing. These diapers are also One Size (OS) which means they were designed to fit up to potty training so around 2 years of age. 
I some reading on what kind of diaper rash ointment to use with cloth diapers because for one you dont want it to be harmful to baby AND you don't want to compensate the absorbancy of your cloth diapers. I decided on Coconut Oil. This was $7.49 at Fred Meyers. Its basically a butter consistency so it works perfectly to rub on a babys bottom. :)
Another Money saver is to make your own cloth diaper detergent. This was INCREDIBLY easy! I have seen this detergent recipe on lots of blogs and a friend from church recommended it. So far no skin reactions and the cloth diapers look and smell fine after a wash. Yes there is Borax in this recipe but I did lots of reading on it and it gets all washed out of the diapers in the process. FYI some babies do have reactions to different detergents, therefore this MIGHT not be the recipe for your baby. 
Ingredients:
Equal parts of Oxi Clean, Washing Soda and Borax.
This made a tub full of detergent and you only need 1-2 Tablespoons of detergent for one wash...OBVIOUSLY this is gonna last a VERY long time!
Total Cost was: $13

Before cloth diapering you do have to way out the pros and cons for your life style...are you on the go alot? Can you stand to do laundry every three days or so? Consider that you use more water or warm water when washing cloth diapers, and it may take your baby some getting use to a wet feeling on their bum. So far I love cloth diapering, its NOT as hard as everyone says it is. 
More posts to come about cloth diapering :)


Tuesday, July 17, 2012

Healthier MoNkEY BaRs

These should really be called Mmm Monkey bars cause I cant seem to eat them without saying Mmmmm! Its basically a banana bread recipe with icing...ohh so good. This recipe is from a website called 
Super easy:
                                                                     1 ½ cups sugar
1 cup sour cream
½ cup butter, softened
2 eggs
1 ¾ cups (3 or 4) ripe bananas, mashed
2 teaspoons vanilla
2 cups flour
1 teaspoon baking soda
¾ teaspoon salt
½ cup chopped walnuts (optional)
 
Mix the first four ingredients then add the bananas, and vanilla. Mix the dry ingredients then add them to the wet mixture. NOTE: I used half white flour and half whole wheat flour. I also used greek yogurt instead of sour cream.
Once all mixed together, grease and flour a regular 9x13 glass pan. Pour the mixture into the pan and bake at 375 for 20-25 minutes. I took mine out around 23 minutes cause I like my desserts slightly gooey in the middle. When the Monkey bars are almost done start your icing. You will need:
1/2 cup butter
4 cups powdered sugar
1 1/2 teaspoons vanilla 
3 Tablespoons milk

In a saucepan bring the butter to a boil, then immediately add the powdered sugar. Mix well and then add the last two ingredients. Let the Monkey bars cool just for a couple minutes then pour the icing over the bars while its still warm and spread it around. Let them cool completely unless you like warm ooey gooey desserts (which I do). Enjoy!

Stuffed Peppers!

I have to say I was impressed with this recipe. I am not a huge cooked peppers fan but I really enjoyed this meal. It was a great summer meal. Again, thanks to pinterest, we enjoyed yet another fabulous meal. Here is the recipe and the site I got it from http://simplylovefood.blog.com/2012/02/25/southwestern-stuffed-peppers/


Monday, July 16, 2012

DIY Sockbun updo

I was joking with my best friend the other day saying that this site really should be called Krissas copycat hands since I just trial everyone's ideas. :) This is the Sockbun hair do, I can not express how easy this is. As long as you have long hair that is not TOO layered it can easily be done. You take a sock and cut off the toes, creating a tube of fabric. You then proceed to roll up the sock to look like a donut. Comb your hair, and put it in a high tight ponytail. Then place the Sock as it is rolled up, around your ponytail. I spread all my hair around the surface of the sock cause I have thin hair. Start rolling the hair around the outside of the sock until you roll in against your head. I then like to pin it down with a couple bobby pins just to secure it. This sure lasted ALL day. :) This is a hard to explain tutorial so I would watch this youtube video to help out. 

Thursday, July 12, 2012

Messy Twist

I did this hair do a couple of ways to see how it best held through the day. This was the first way I attempted it and I loved the way it looked. Unfortunately, it fell out within a couple hours. The new way that I did this looks almost exact! I did one big twist in the back, slowly gathering big chunks of hair from each side of my head (kind of like french braiding). I left a strand at the base of my neck to wrap around the ponytail. I then took a small band and tied the end of it...this made it hold all day. I then wrapped my extra hair strand around the band and bobby pinned it under the ponytail against my head. There are lots of ways to do this do. 
The one I found originally on pinterest was  three different sections of hair. The middle was twisted just as so, then the other sides overlapped the twist and was pinned. Here is the pinterest photo:


Crock pot Chicken Tacos

This was the BEST chicken I have ever made! Pull out that handy-dandy crock pot, throw in 6 chicken breasts, a taco seasoning packet and a 16oz jar of salsa. Cook on high for 3-4 hours. Your chicken then should be tender enough to take two forks and shred it. Then enjoy your favorite toppings in a taco or a burrito. :)

Friday, July 6, 2012

The Fish Tail Braid

I had not seen this braid before and so I was excited to try something new. It only took two tries and then I felt pretty confident with this braid. I would explain how to do this braid but I personally learn through visuals and I watched a video on youtube that helped a TON. I advise this video from youtube. I just typed in Fishtail Braid Tutorial and it is the first one suggested. 

The fishtail braid can also be a french fishtail braid which I have not attempted yet. It can be done as a side braid as I have in the top photo or straight back. Lots of variety with this braid.

Thursday, July 5, 2012

Chalk Board Wonders...

Have I mentioned that I LOVE pinterest? Well, I am not just a pinner...but also a doer. I really try to stop pinning things and get off my bum and actually do these stinkin cute ideas. One creative idea I found and adore is the chalk board ideas. Almost any chalk board idea I love. It is a simple, cute and creative way to keep track of dates in pictures, celebrations, holidays, announcements and more. The latest event that I just my homemade chalk board for was yesterday (4th of July). This way I dont have to remember what year or what holiday this picture was from on my own...its in the picture with my son.

To make a chalk board is super duper easy. I just found a spare piece of wood in my parents shed, I recommend sanding it first (I didnt and its too rough), then painting it with chalk board paint. I then went to Home Depot and bought a metal handle and screwed/wood glued it onto the board upside down to hold chalk pieces. Total cost was maybe 5$ since my parents already had the wood and paint.

Braided Poof

Lately, I have been into pinterest DIY hairdos. Especially with summer here and my hair is getting long, I want fun styles to try. As for being a mom it is SO easy to just throw my hair into a ponytail when I could spend five minutes and do something cute. SO...you will see hairdo's for the summer time in the next couple postings. :) YAY!

This is what I call the Braided poof. SO VERY SIMPLE! Just braid what you would have normally "poofed" on the top of your head. Hair spray, then either straighten the rest of your hair or do big wavy curls like I did. I did my curls in about five minutes so this hairdo seriously took maybe ten minutes. I take big chunks of hair and ringlet curl them, dont touch them till they cool off and then run your fingers through them, hair spray and SHAZAM!! You just did a hairdo in ten minutes or less.


Tuesday, July 3, 2012

Chocolate Chip Cookie Dough Devils Food Cake Cheesecake...fhhewww! Thats a long name for ya! This was a DELICIOUS treat I made for Fathers Day this year. It wasnt AS time consuming as I had thought and it was well worth it. I am obsessed with Pinterest and I found it on there. Here is the direct Link: Sprinklebakes.com

Here is a peek at the inside of this amazing cake...

Friday, May 18, 2012


I Made this dress for 6$. I spent 4$ on the fabric and 2$ on the thread. I already had a tank top that I used and BAM you have a dress. It seriously took a half hour to make. ANYONE can do it! Here is the website I got the idea from. :)

http://asmallsnippet.blogspot.com/search/label/sewing